
The tools we have for 3D printing are getting better and better, and this is a clear example of this evolution.
Where does Orca Slicer come from?
We would have to go back to 2011, with the creation of Slic3r by Alessandro Ranellucci.
![]()
This program was our favorite for many years, until little by little it was abandoned.
Luckily it was taken up by Prusa, to be called Prusa Slicer, who improved it in the following years.

In this period they incorporated some very interesting features, which we already take for granted:
- Advanced Gcode preview.
- Organic supports.
- Paint supports.
- Smart fills.
- Etc.
A notable step was the incorporation of Arachne, as a perimeter generator. Originally developed by CURA, it is now present in most Gcode generators.

Bambu Lab, takes all this community developed software open and compatible with all printers and develops a powerful tool called "Bambu Studio", but makes it only compatible with their own printers.
:_(
That is where SoftFever Appears, and develops a variant of Bambu Studio, compatible with practically all printers currently on the market.
Not only this, but adds:
- Own improvements.
- Improvements to other variants, such as Super Slicer.

Resulting in what is possibly the most advanced and complete software for 3D printing today.
Interface:
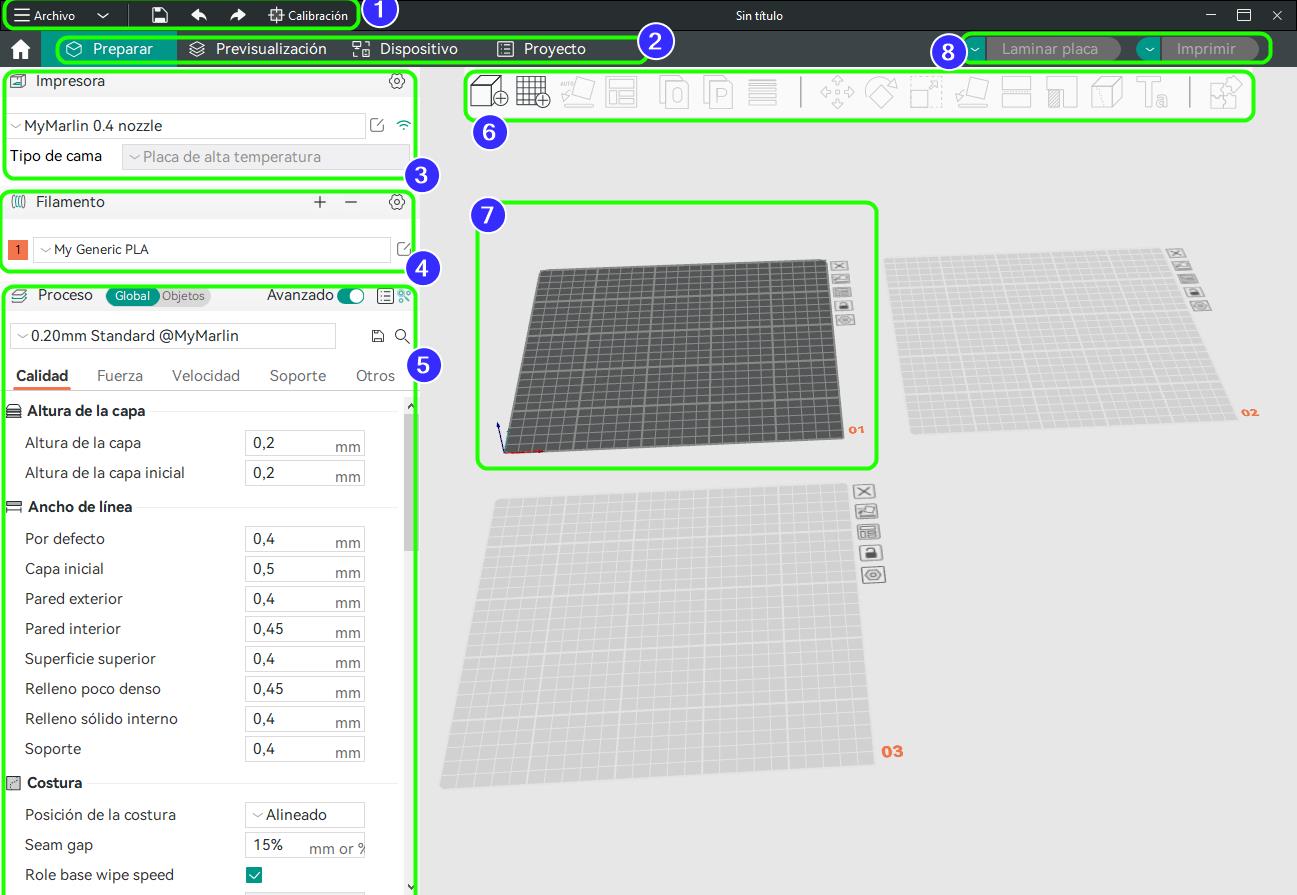
- File Menu.
From here we can save our project, undo and redo, plus we have a shortcut to the calibration menu, where we can find said menu and a link to the tutorial. - View Tabs.
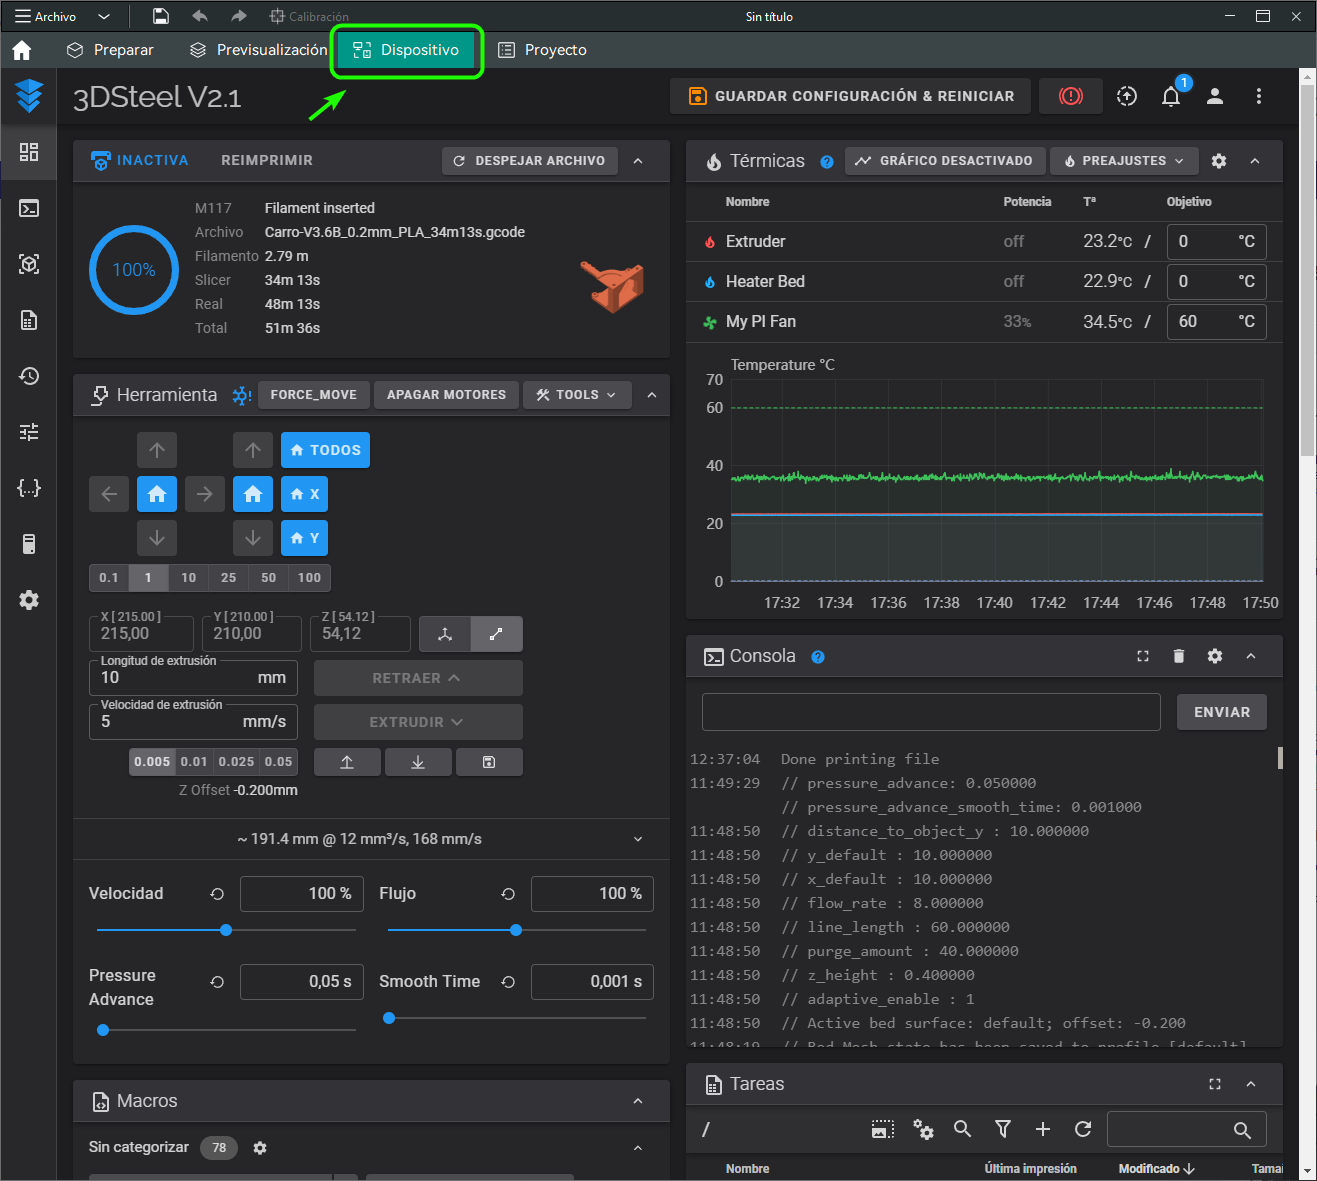
In addition to the traditional "Prepare" and "Preview" where we can see our model, and a preview of our Gcode, we have the "Device" tab where we can easily see our device with Klipper OR RepRapFirmware, without opening an additional browser.
In the project tab we can see useful information saved in the project with which we are working, such as description, instructions, accessories, etc. - Printer Settings.
Here we can configure the printer settings, such as print volume, extruder, retraction, etc. In addition, the parameters for the connection, such as IP address. - Filament configuration.
It helps us to make all the necessary adjustments of temperature, cooling, flow, etc. Related to the material.
It should be noted that it allows us to enter the value of "Pressure Advance" and the "Thermal contraction of the material", so that the piece will automatically scale so that once cold it has the appropriate size. For example, PLA 3D850 shrinks approximately 1mm for every 200mm, that is, 0.5%. In certain pieces it is essential to take it into account. - Process menu.
It is the menu where we choose most of the printing parameters, such as layer height, perimeters, padding and padding density, etc. It will look pretty familiar, except that the order of the parameters is a bit different. - Tools panel.
With this panel we can rotate the pieces to align them with the base, organize them, etc. It has some interesting news like: - Add Plate, which adds an additional base.
- Orient automatically. The program will recommend a side to be used as a base.
- Painted Supports.
- Painted seams.
- Text Engraving.
- Work zone.
Here we will see the pieces with which we are working, it has the advantage of being able to have several plates at the same time. Each deck has its own buttons for aligning pieces and arranging them. - Laminate and print buttons.
In addition to the options that can be expected, it offers us the option to laminate all the plates sequentially. We can then send each plate to a printer, or save them as individual Gcode files.
What makes it special?
It takes the best of each of its predecessors and presents it to us completely free of charge.
Also, as if that were not enough, it adds some very interesting features (which other programs are already taking from it):
- Automatic calibrations:
- Flow.
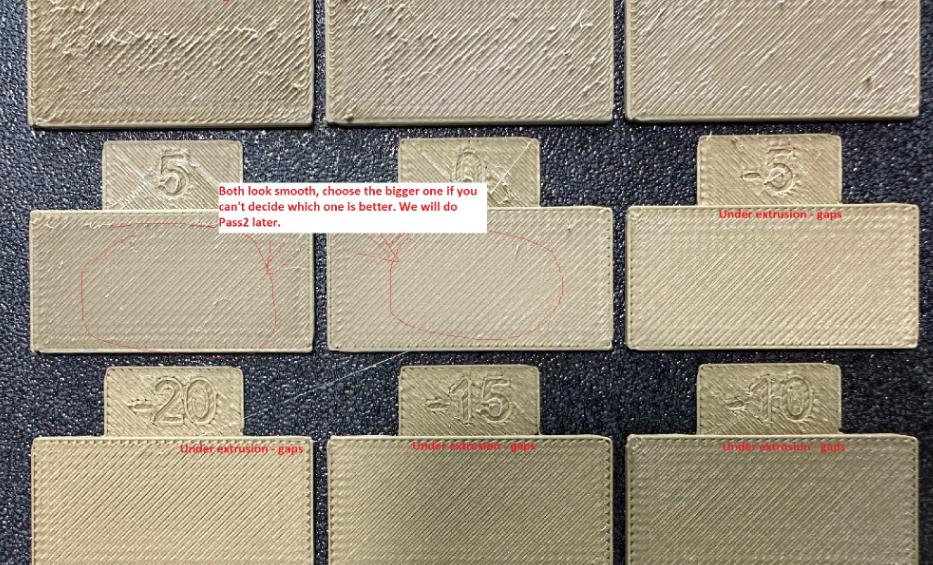
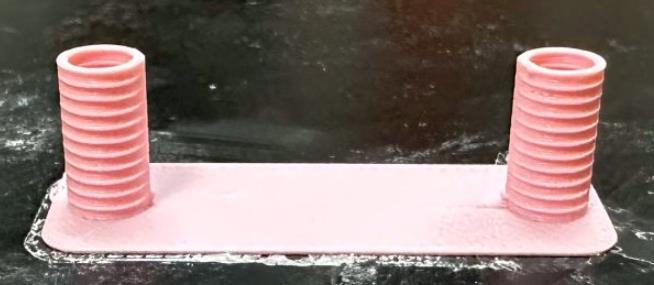
It will generate some small rectangles with which we can comfortably validate the correct flow of our printer based on the result of the upper layer. If we have excess material, it will be visible in the form of irregularities, and if we have a lack of material, small holes will show up. - Pressure Advance.
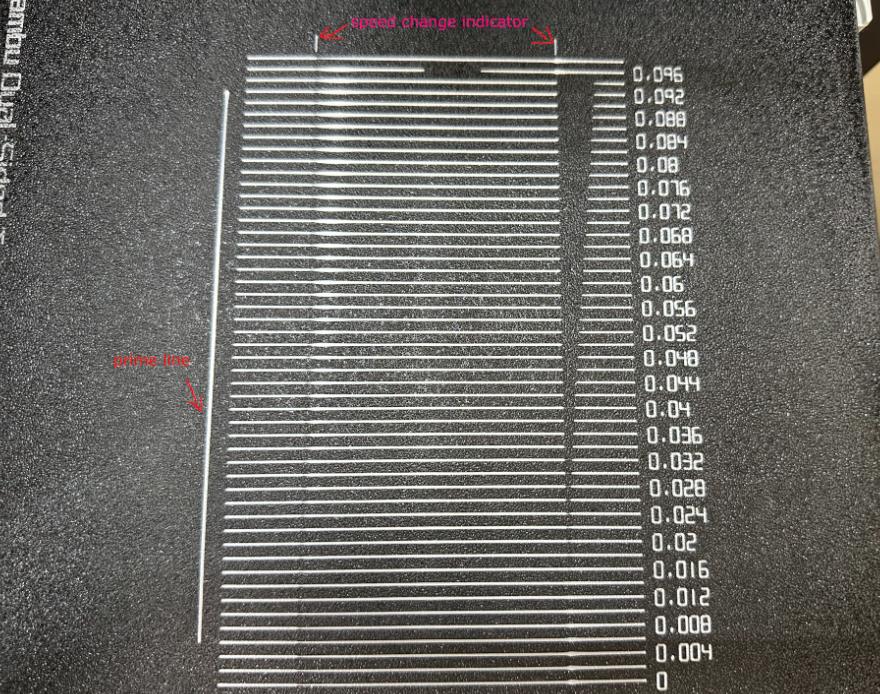
With this test, it will make a different line with each PA value in the interval that we indicate.
The line that is most uniform will be the correct one. If we have doubts between two, it is better to choose the lower value. - Temperature Tower.
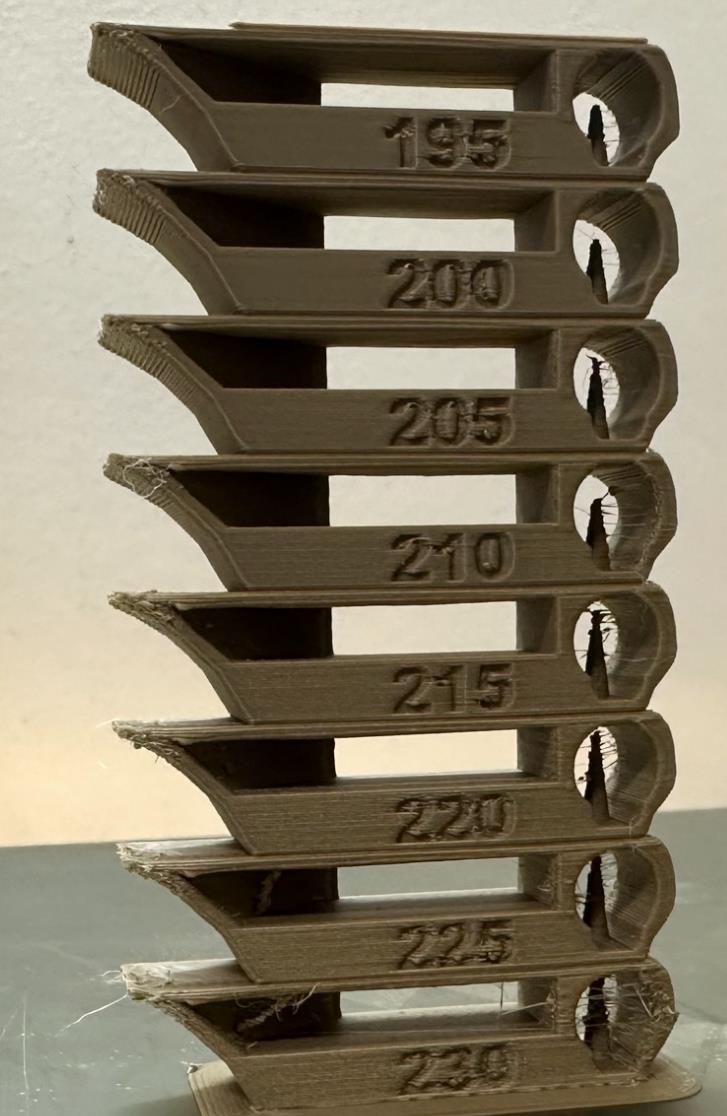
One of the classic tests, which is always recommended to do when you have new material, and unfortunately many times we don't do it. Sometimes it is surprising how by varying the temperature in the extruder by 5 or 10 degrees, we can often achieve much higher results.
With this test generator, we no longer have an excuse for not doing this test, since the program will automatically configure it for us. - Retraction test.
- Tolerance Test (using Allen key as reference)

If we need parts that fit precisely, we will save ourselves a lot of potential upset by doing this simple test. It will give us as a result, the tolerance that we must add to our model, either in the design of the part or in the Gcode configuration.
Another very simple and quick test to do, which will help us both to avoid annoying "hairs" and to hide the seam of the casing as much as possible. Easily and with very few grams of material.
- Support improvements.
- Very interesting predefined profiles:
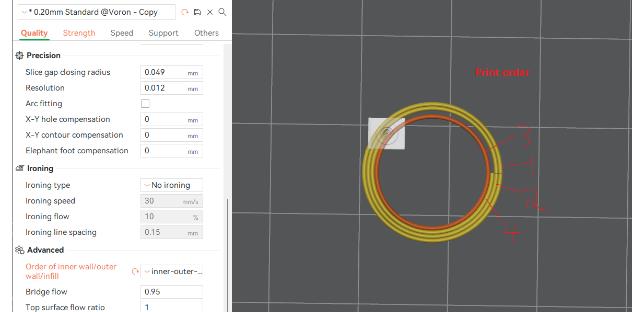
- Different modes for the order of the perimeters, such as the "sandwich" mode.
- Support for Klipper, essential today.
- Support for RRF.
Special functions.
The first thing we liked about this program is the possibility of having several dishes within the same project.
This should become the standard, in this type of programs in my opinion.
I think this image sums it up completely:

We can easily pass a piece from one plate to another. Add or remove pieces from our set. Put plates with several copies, large, small, etc.
And as if that were not enough, we can click on "Laminate all" It will generate the Gcode for each of the dishes one by one.
With other programs, making a change in a complete project becomes a super tedious process, with this solution we can save a lot of time and energy.
Also, you can save all this in a single file.
Advantages and disadvantages.
It is Open Source.
Superadvanced.
It costs 0.
It offers excellent results.
It also allows us to control our printer by IP (if you have this type of configuration):
It seems that all are advantages, but it is not so, currently the program is still in an early phase and has some bugs. It works better and better, and I am sure that in a matter of a few months it will be an ideal program for everyone. But currently you have to be a little careful when using it, since we can find an error.
Where can I download it?
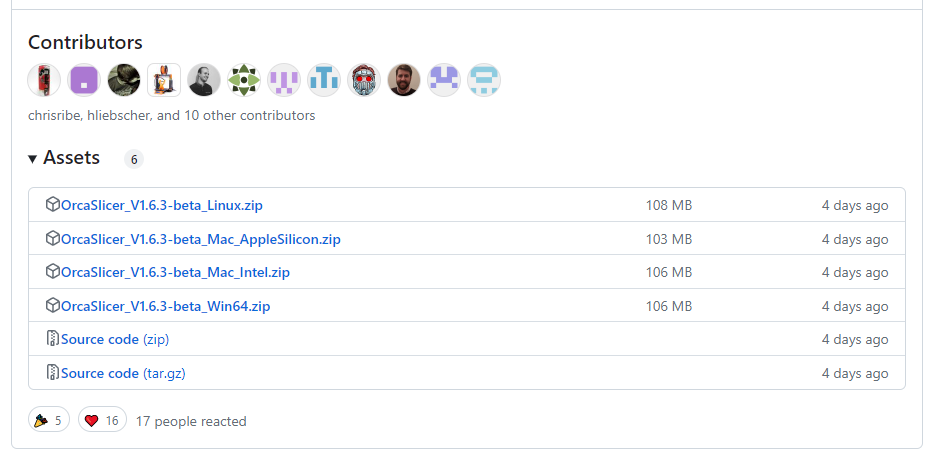
It can be downloaded from the official GitHub:
https://github.com/SoftFever/OrcaSlicer/releases
Where we can find the package for various operating systems:
How to use it for my 3D printer?
As we already explained in our post about Super Slicer:
https://www.hta3d.com/en/blog/super-slicer-probably-the-best-program-to-generate-gcode-for-your-3d-printer
Orca Slicer has a large number of predefined profiles. Can:
- Select the profile of our specific printer model.
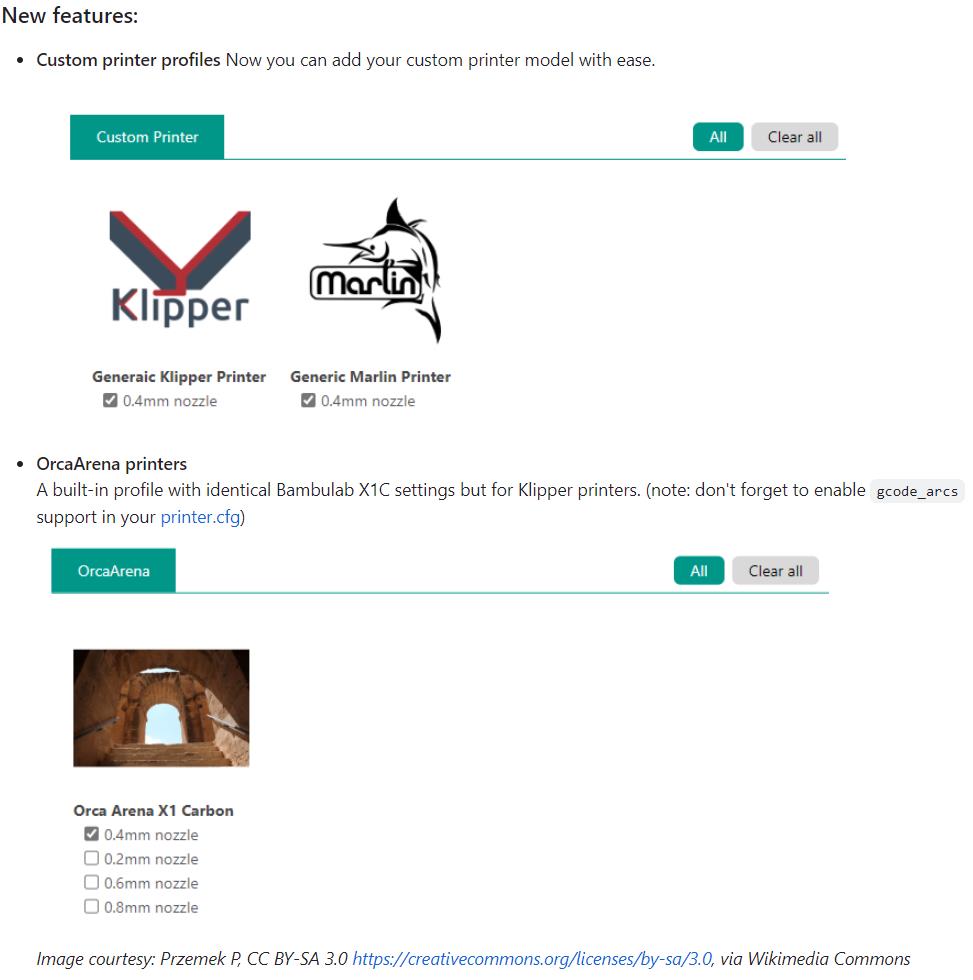
- Select a generic profile and customize it (recommended), we find three main profiles:
- "Generic Marlin Printer"
- "Generic Klipper Printer"
- "Orca Arena X1 Carbon"For high performance Klipper based 3D printers.
In any case, it is convenient to review two main points:
- Bed size and maximum height in X. In the case of our 3DSteel V2, it looks like this:
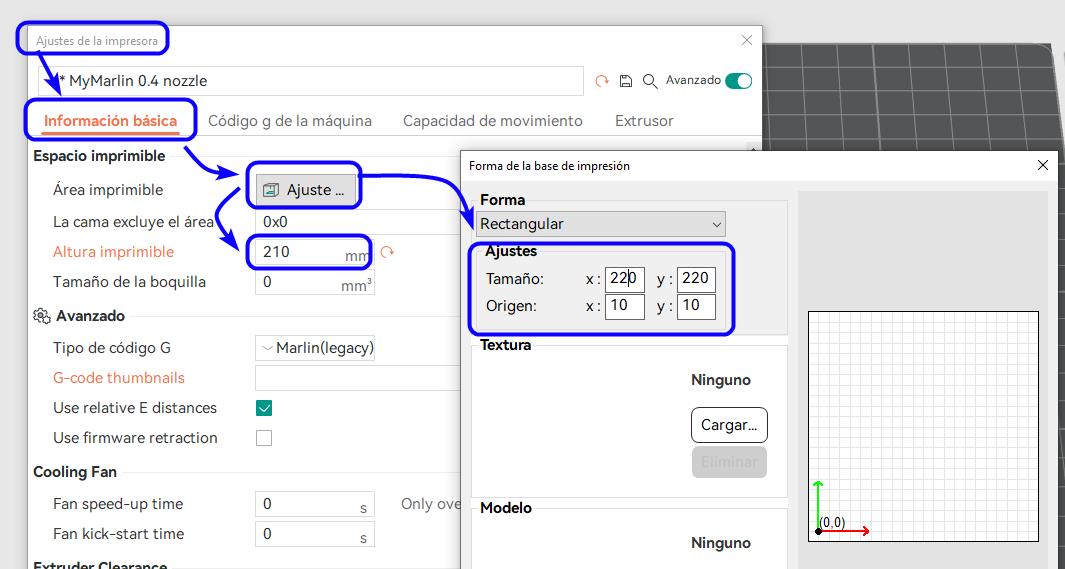
- Custom G codes.
You can use the standard Orca Slicer codes, but you can also put the one recommended by us for our Marlin printers:
Initial G Code:
M190 S[first_layer_bed_temperature]; calienta cama y espera
M104 S[first_layer_temperature]; calienta hotend sin esperar
M280 P0 S160; reset 3dtouch
G28 ; home all axes
G29; nivelar
G1 Z5 F5000 ; lift nozzle
G1 Y100 F5000; Evita pinzas
M109 S[first_layer_temperature]; espera hotend
Final G code:
M104 S0 ; turn off temperature
M140 S0 ; turn off bed
M107 ;Turn off fan
G1 X205 Y205 F5000; Aparta cabezal
M84 ; disable motors
In the case of using Klipper you can use the "PRINT START" macro, if you already have it configured with its warm-ups and others you can delete the M190 and M109 that it places by default at the beginning, leaving it like this:
Initial G Code:
PRINT_START EXTRUDER=[nozzle_temperature_initial_layer] BED=[bed_temperature_initial_layer_single]
PRINT_END
9 Comment(s)
Ho la flsun 400 e con orcaslicer non riesco a visualizzare la miniatura dello oggetto in stampa sul pad della stampante come si fa a fare vedere la mignatura?
I suggest update klipper, mainsail, and klipperScreen. Also in Orca Slicer Printer options write the resolution you wish. for example 300x300.
Hi, where can I find a list of parameters like "first_layer_bed_temperature".
I need the parameter for print_bed_max and printable_height.
The slicer environment looks really interesting, but unfortunately I don't see a profile for my Sovol SV04 printer with idex anywhere. I don't really want to set up the profile from the very beginning, because there are slightly different parameters thanks to the two extruders. Is there somewhere to download this profile?
Is there any way for OrcaSlicer to send GCode to the printer via USB cable connecton (As CURA can do)?
Many thanks in advance.
How can i make print preview visible on my elegoo neptune 4 pro screen?
I like this slicer but wish we could override the spacing error indicating prints are too close together when print sequence is "by object". For instance, if I'm trying to print one very thin object and then a separate one immediately adjacent so they they fuse together (printing a butterfly outline and then color inserts on my single extruder voron printer) I get an error ".stl is too close to others and collisions may occur" that I can not override meaning I have to use a different slicer to accomplish what I want to do.
Thanks for this program (old school not app)
Thank you for the suggestion. I'll give it a try.
Thank you for the suggestion. I'll give it a try.
Leave a Comment