Menu
Your Cart

P3Steel / Prusa I3 Steel Frame - Galvanized / Stainless

P3Steel / Prusa I3 Steel Frame - Galvanized / Stainless
85.00€
Tax 70.25€
  • Stock: 17
  • Model: P3Steel-frame

Available Options

Free shipping to mainland Spain, cheap to other destinations.

Pay in three interest-free installments with PayPal. 0% APR.

1. GALVANIZED STEEL FRAME (3MM):

Laser cutting of a high-quality galvanized steel sheet, according to our redesign, with the following improvements:

  • Dramatically lightened the Y axis carriage, in order to improve dynamic behavior.

  • Filament support included.

  • Fixed the problem with the upper left side (the extruder clashed with it), and also the problem of the nut that clashed with Y axis motor.

  • Modified the distance between the two pieces that make the Y axis tensioner, so as to hold the F624zz bearings with washers. Also, modified the hole diameter. 

  • Y axis now measure 350mm, the extra 9mm are added on the front side. 

  • Y axis bearing holder and Y axis belt holder are replaced by printed parts, as the metalic parts caused troubles.

2. THEADED AND SMOOTH ROD KIT (CONFIGURABLE): 

  • 2x 375mm Smooth Rods – Stainless Steel

  • 2x 350mm Smooth Rods – Stainless Steel

  • 2x 320mm Smooth Rods – Stainless Steel

  • 2x 300mm M5 Threaded Rods – Stainless Steel

  • 1x Smooth Rod for filament support

The cutting is done by hand, so that the meassure can be slightly higher (+ 1mm or similar) not lower. All rods are shipped without burr and the edges filed down properly.

3. EXTRA:

  • Printed parts for Y carriage:

    • Y Belt holder

    • 4x Lm8uu holders

100% Customers recommend this product

  • 5 Awesome
    90.32%
  • 4 Great
    9.68%
  • 3 Average
    0%
  • 2 Bad
    0%
  • 1 Poor
    0%
Please login or register to review

Reviews Over P3Steel / Prusa I3 Steel Frame - Galvanized / Stainless

  • (5)

Total Reviews (31)
click here write review to add review for this product.


Assembly Tutorial

New step by step tutorials:

We have prepared a new updated tutorial serie, with further information about available options. Also printable, so you don't need a display to follow the instructions:

  1. Tutorial 1 - Estructure and Y Axis
  2. Tutorial 2 for M5 - X Axis and Z Axis

  3. Tutorial 2 for T8 Leadscrews - X axis and Z Axis

  4. Tutorial 3 - Heated Bed

  5. Tutorial 4 - Extruder

  6. Tutorial 5 - Power Supply

  7. Tutorial 6 - Electronics and connectios

  8. Tutorial 7 - Last Adjustments

  9. Tutorial 8 - Hotend Flow Calibration


Assembly Tutorial (Spanish with english subtitles):  

Important: We recommend reading the instructions in this tab completely, in addition to following the assembly from here since we have included additional information to the videos.

Updates:

  • Thermistors have now dupont connector, no soldering required.
  • Stepper motors include cable connector on base. In addition, we ship them with the wires in the correct order for Ramps 1.4. So you do not have to change the order.
  • Marlin updated to 1.1.0 RC 7 version:
    • Improved filament change system from the LCD or using command M600
    • Bed leveling function optimized, get easily a perfect first layer.
    • Small bugs fixed, now more information is displayed on the LCD.

Frequently asked questions:

  • How all fans are connected to the printer?
    ​Fans are connected as follows:
    • Layer fan: Connected to D9 as indicated in the video
    • Hotend fan: connected directly to 12v, the connection can be done like on the video or connected to the output of 12v on Ramps 1.4 
    • Electronics Fan: connected directly to 12v, the connection can be done like on the video or connected to the output of 12v on Ramps 1.4 
  • The extruder motor does not move when I try to move it from the LCD.
    Marlin has a protection to prevent accidental movement, so the extruder will not move with temperatures under 170°C. Try heating the hotend over this temperature and the extruder will move

Assembly drawings:

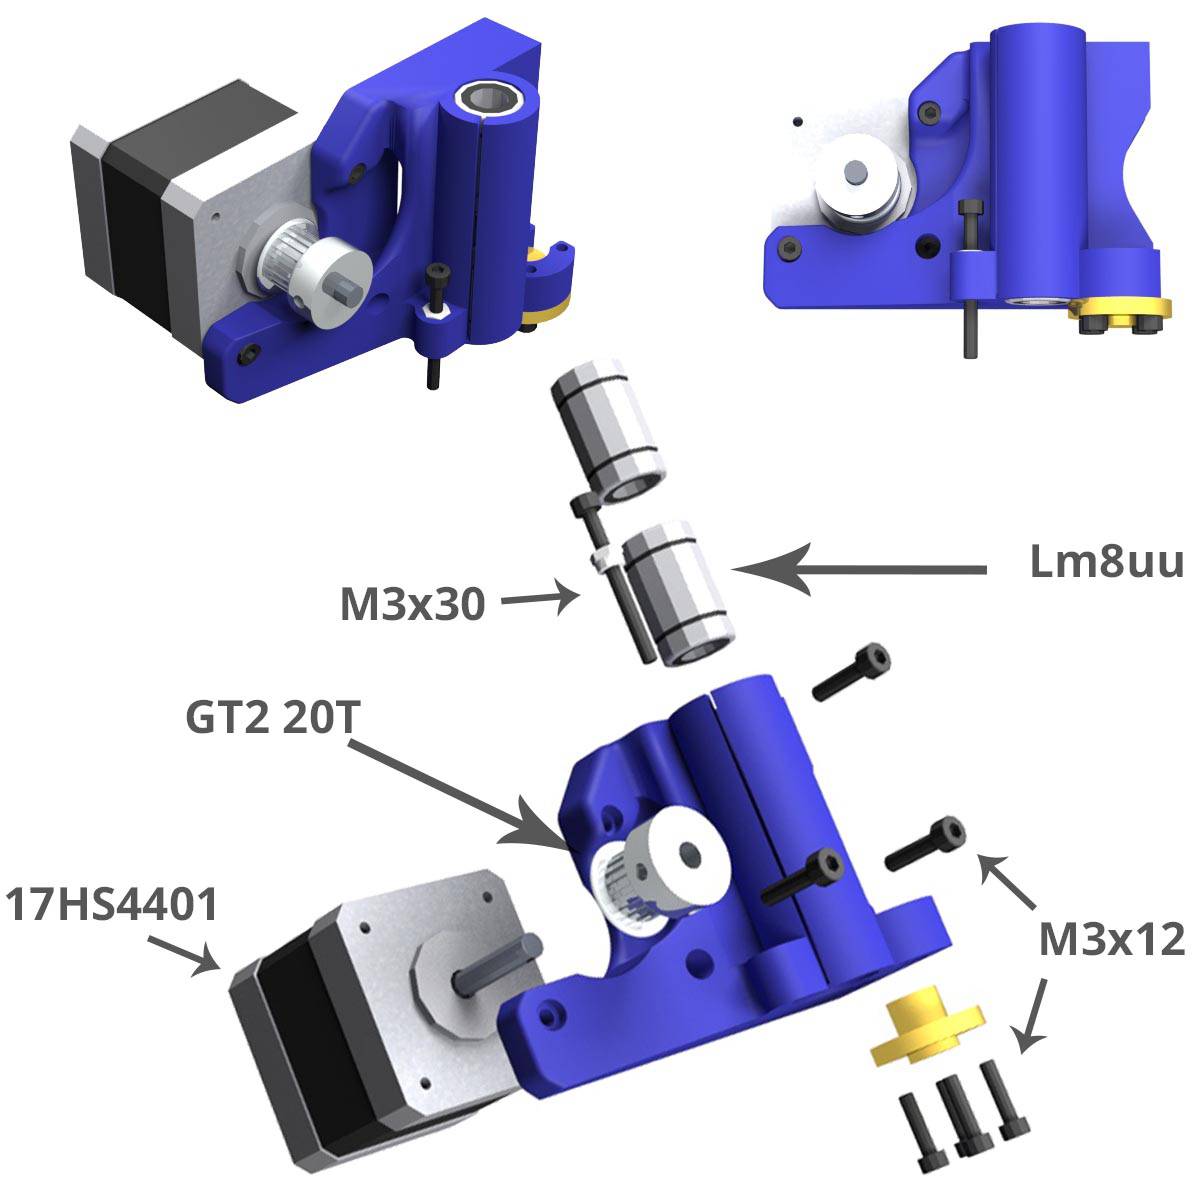
Xmotor, Leadscrews version:

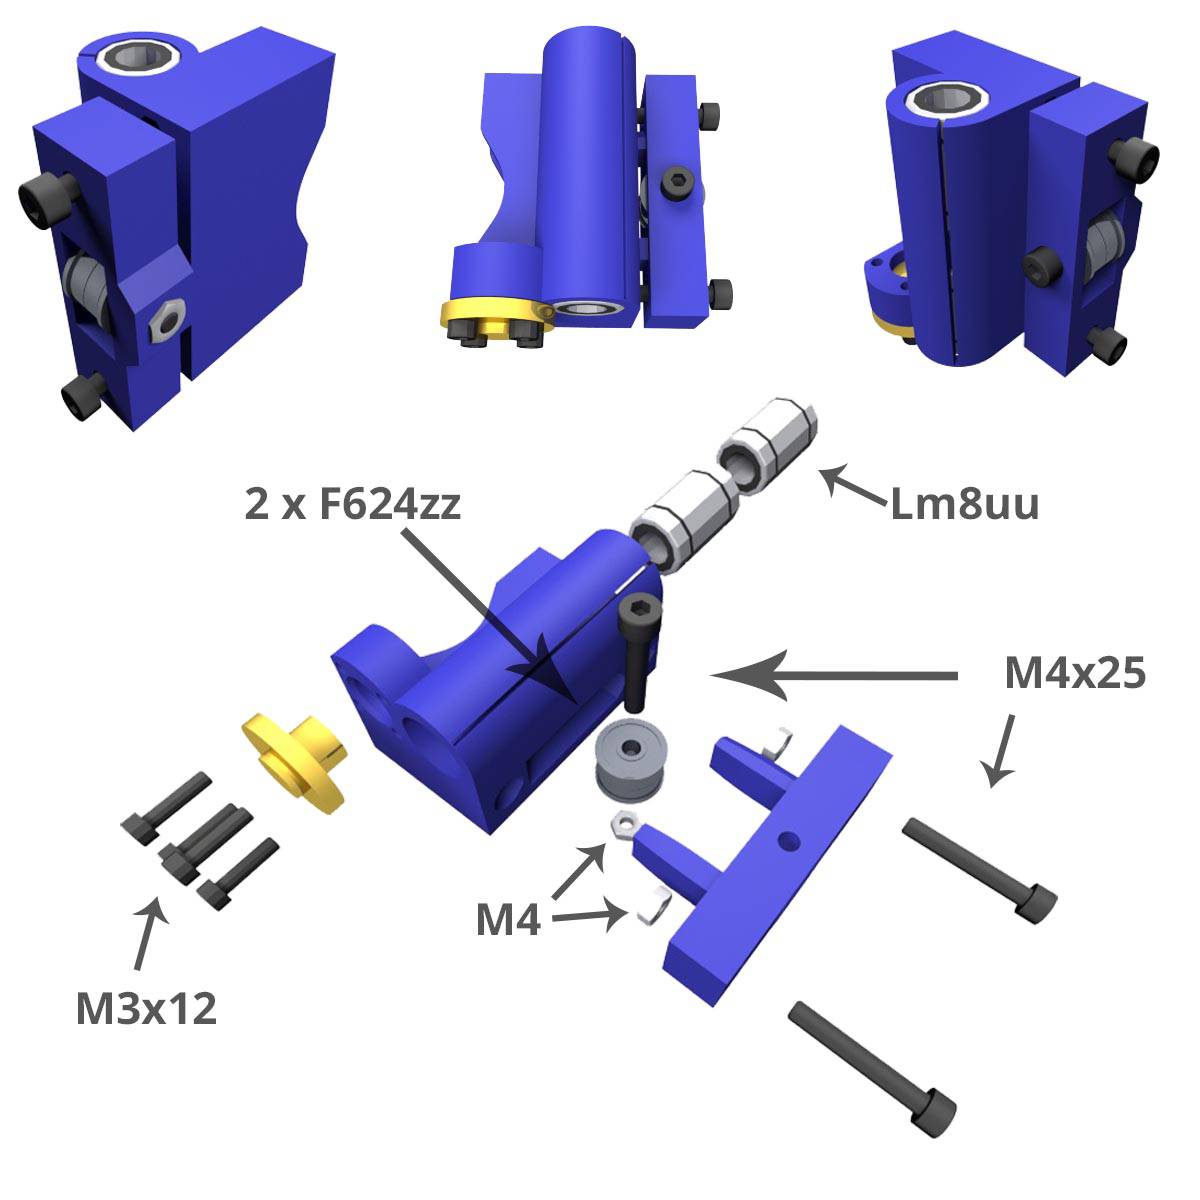
X idler, Leadscrews version:

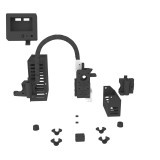
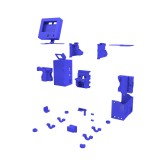
Extruder detail, Leadscrews version:

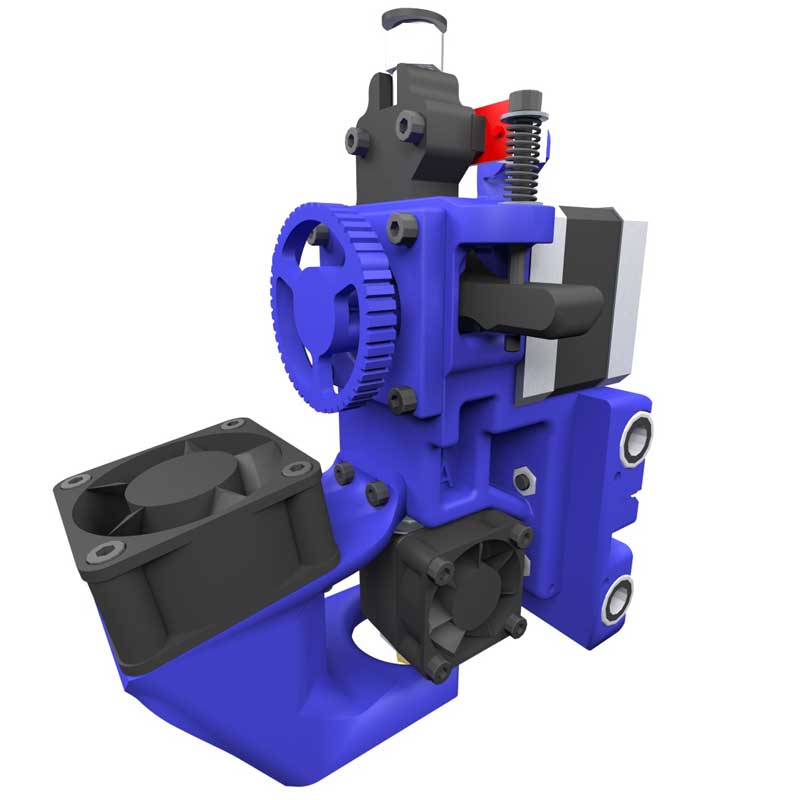
HotEnd detail, Leadscrews version:


Connection Diagram of RAMPS 1.4:

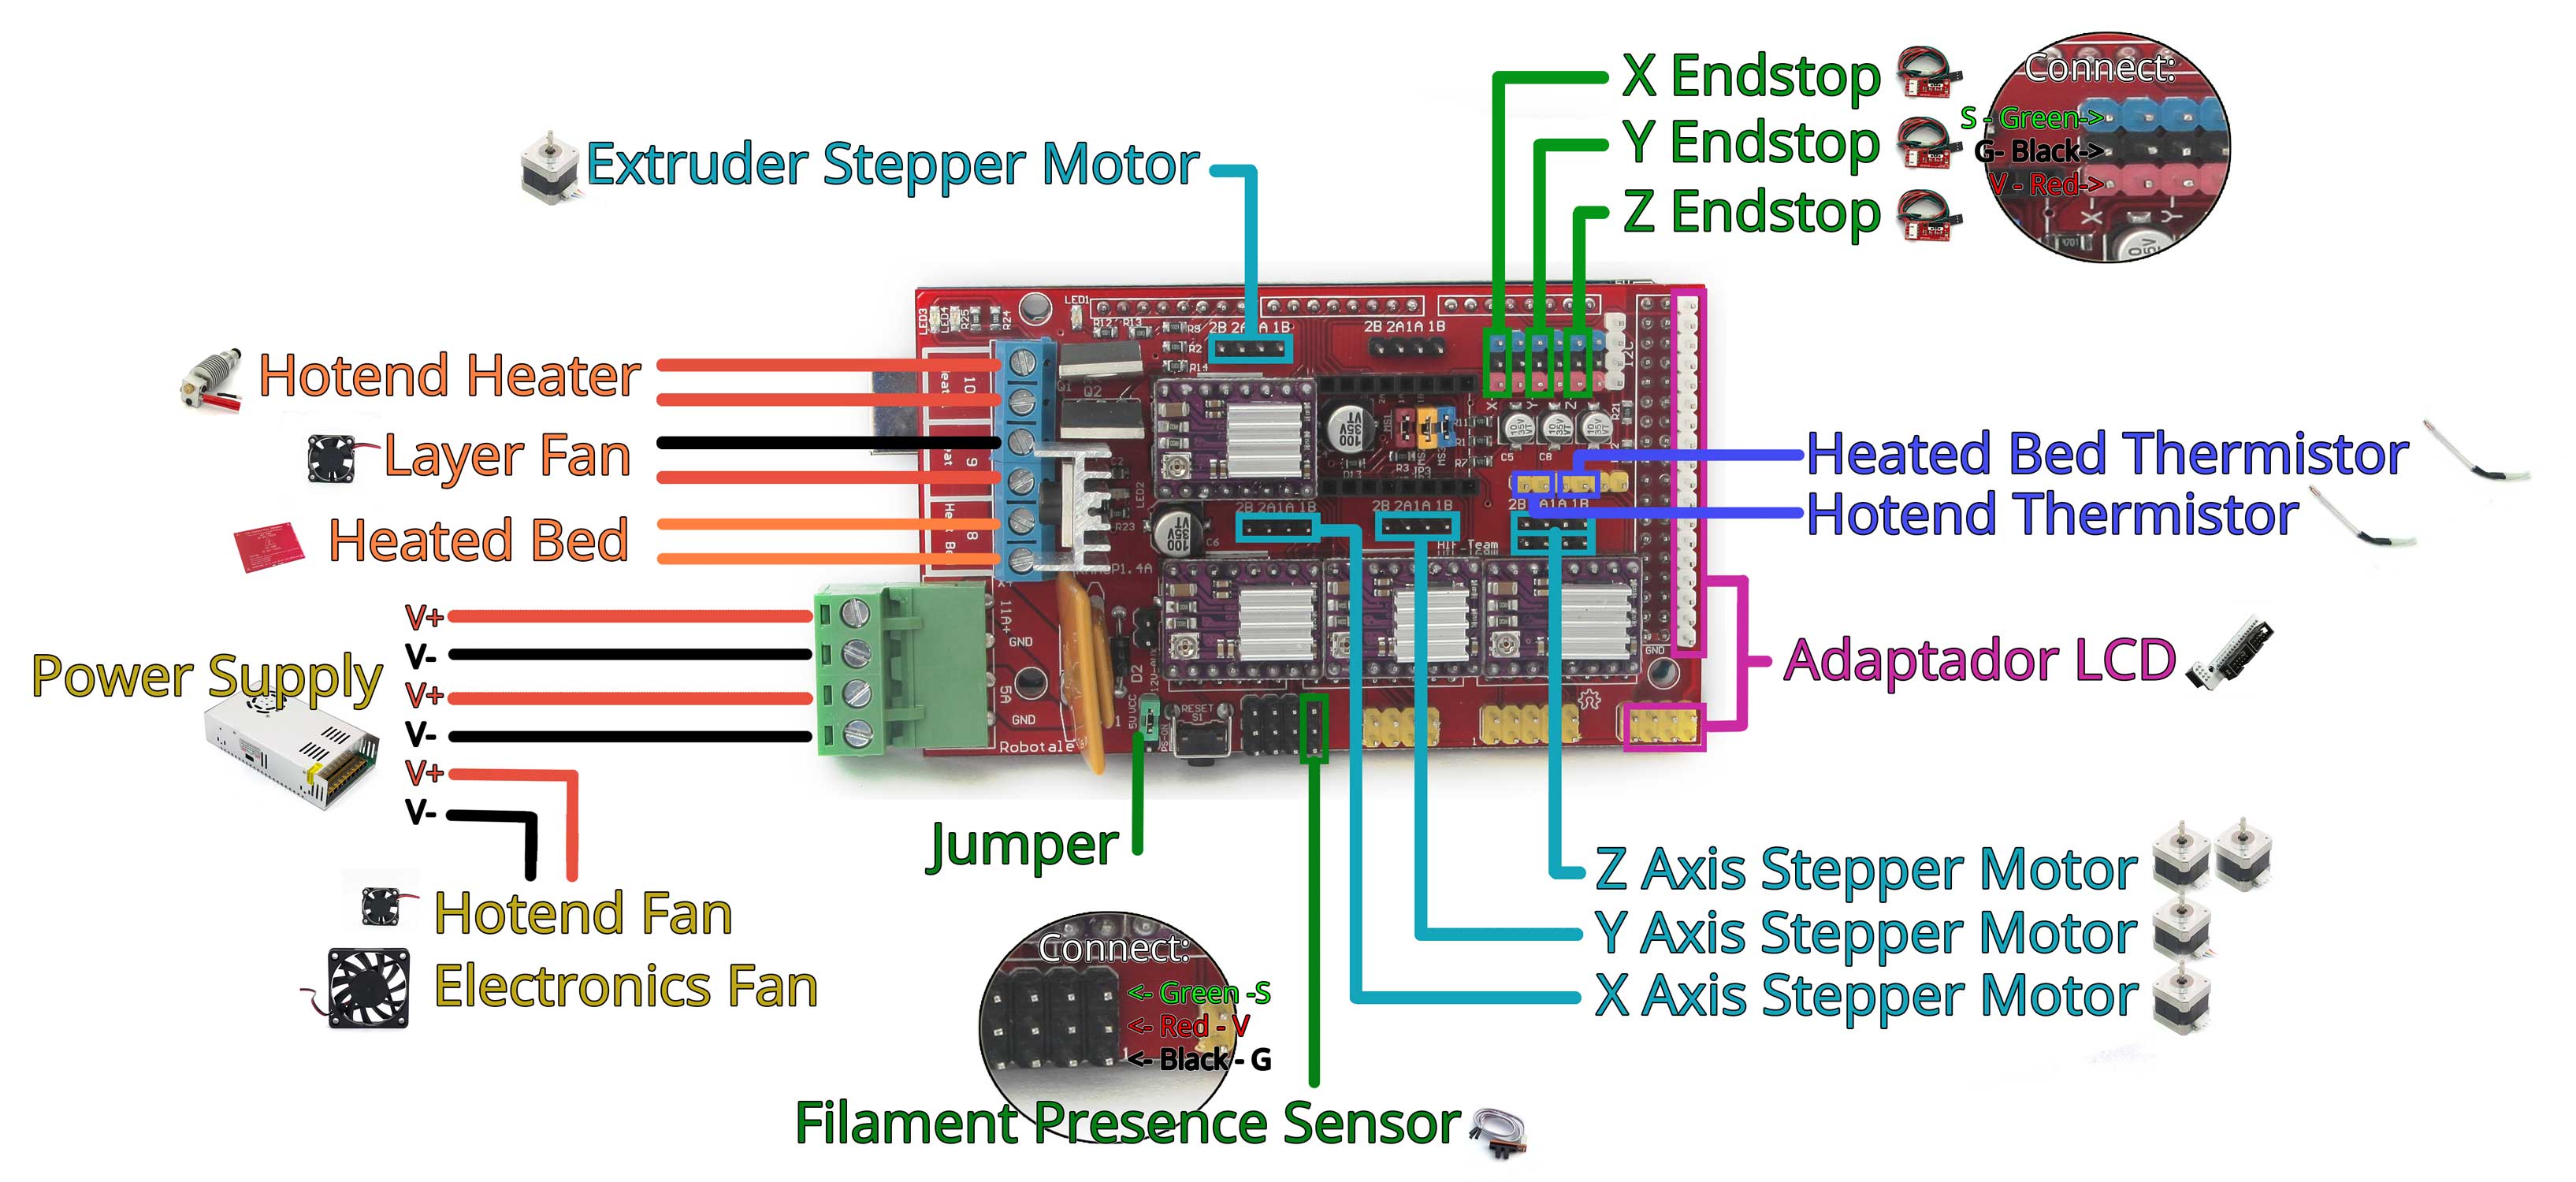
Order and Orientation of the Stepper Motor wires:

  • Keep the colour order of the wire; the RED wire goes DOWNWARDS when connecting to the RAMPS.


Additional considerations:

  • Connect limit switches as indicated in the video or scheme, an incorrect connection can damage the Mega board.

If during installation you have any question, please feel free to contact us. We are here to help you!

Frame, it is the main component of the printer structure and provides the rigidity and stability: 

Check out this bundle
The main mechanical elements of our kit P3Steel by HTA3D, don't forget to include the flexible couplers 5x5 or 5x8 depending on the Z-axis rods you us..
The main mechanical elements of our kit Dual P3Steel by HTA3D, don't forget to include the flexible couplers 5x5 or 5x8 depending on the Z-axis rods y..