

We have based our new 3DSteel model on the popular P3Steel kit, keeping the same frame and rods, as well as many other components to allow the upgrade to this new version.
We have prepared different packs, so you can make a total or partial update with the greatest comfort and flexibility possible. Next, you will find the different parts that you can update and then the changes in the firmware that you have to perform if you do not perform all the updates. If you do all of them, you can install the firmware of the 3DSteel and its updates directly.
Packs are easily editable, that is, you can add the pack completely or partially. You can also add other items to the order if you want to have spare parts.
Mechanical updates:
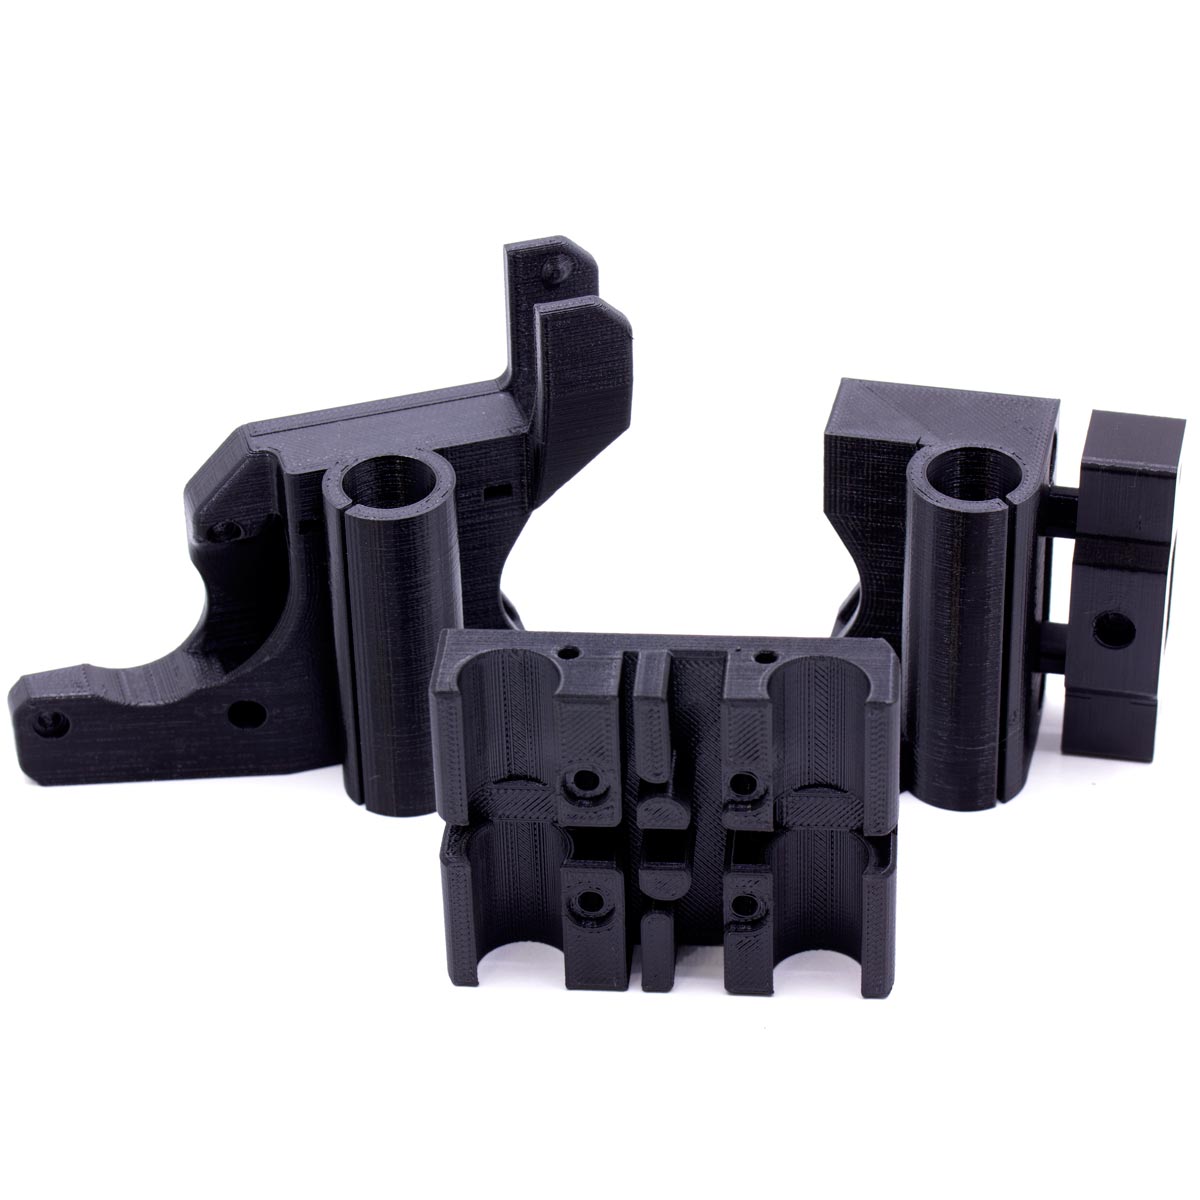
Extruder
 This is perhaps the biggest update of the kit, and we recommend it over the others, since it provides a jump in performance and reliability very important. The double pulley provides an incredible grip to the filament avoiding skidding or biting the material, the filament presence sensor works in a simple and stable way, and the 3DTouch leveling sensor will help us achieve that perfect first layer that makes a difference.
It shares the engine and the hotend with our "V1" extruder, so you will only need the components of this pack. And here the complete already assembled extruder.
If you have a version with the thermistor without encapsulating. since you are going to update the extruder you can also update the thermistor, although it is not essential, here you have the pack.
The filament presence sensor and the leveling sensor are optional and recommended.
Here you can find the assembly instructions.
When installing the 3DTouch sensor, it is advisable to remove the mechanical limit switch from the Z axis.
Z Axis and and X Axis with new chains
 We recommend using a version with spindles, especially for self-leveling. The version with the integrated motor is the best and most recommendable, since it avoids the "Z Wobble" produced by the couplers and transmits the movement to the Z axis with great precision.
Here you can find the assembly steps.
If you already have a version with the integrated spindle you can skip this step.
Keep in mind that the chains are compatible with each other, the new model allows you to easily add or remove the wiring, as well as being thicker for the new sensors that are installed in the extruder.
220x220 Heated Bed
This bed has a size of 220x220mm, and the screws do not bulge through the top, so it facilitates the installation of any glass or magnetic coating.
You can see this indications as reference. And here you have the pack.
Electronics with Ramps 1.6+ and TMC2130 drivers with SPI
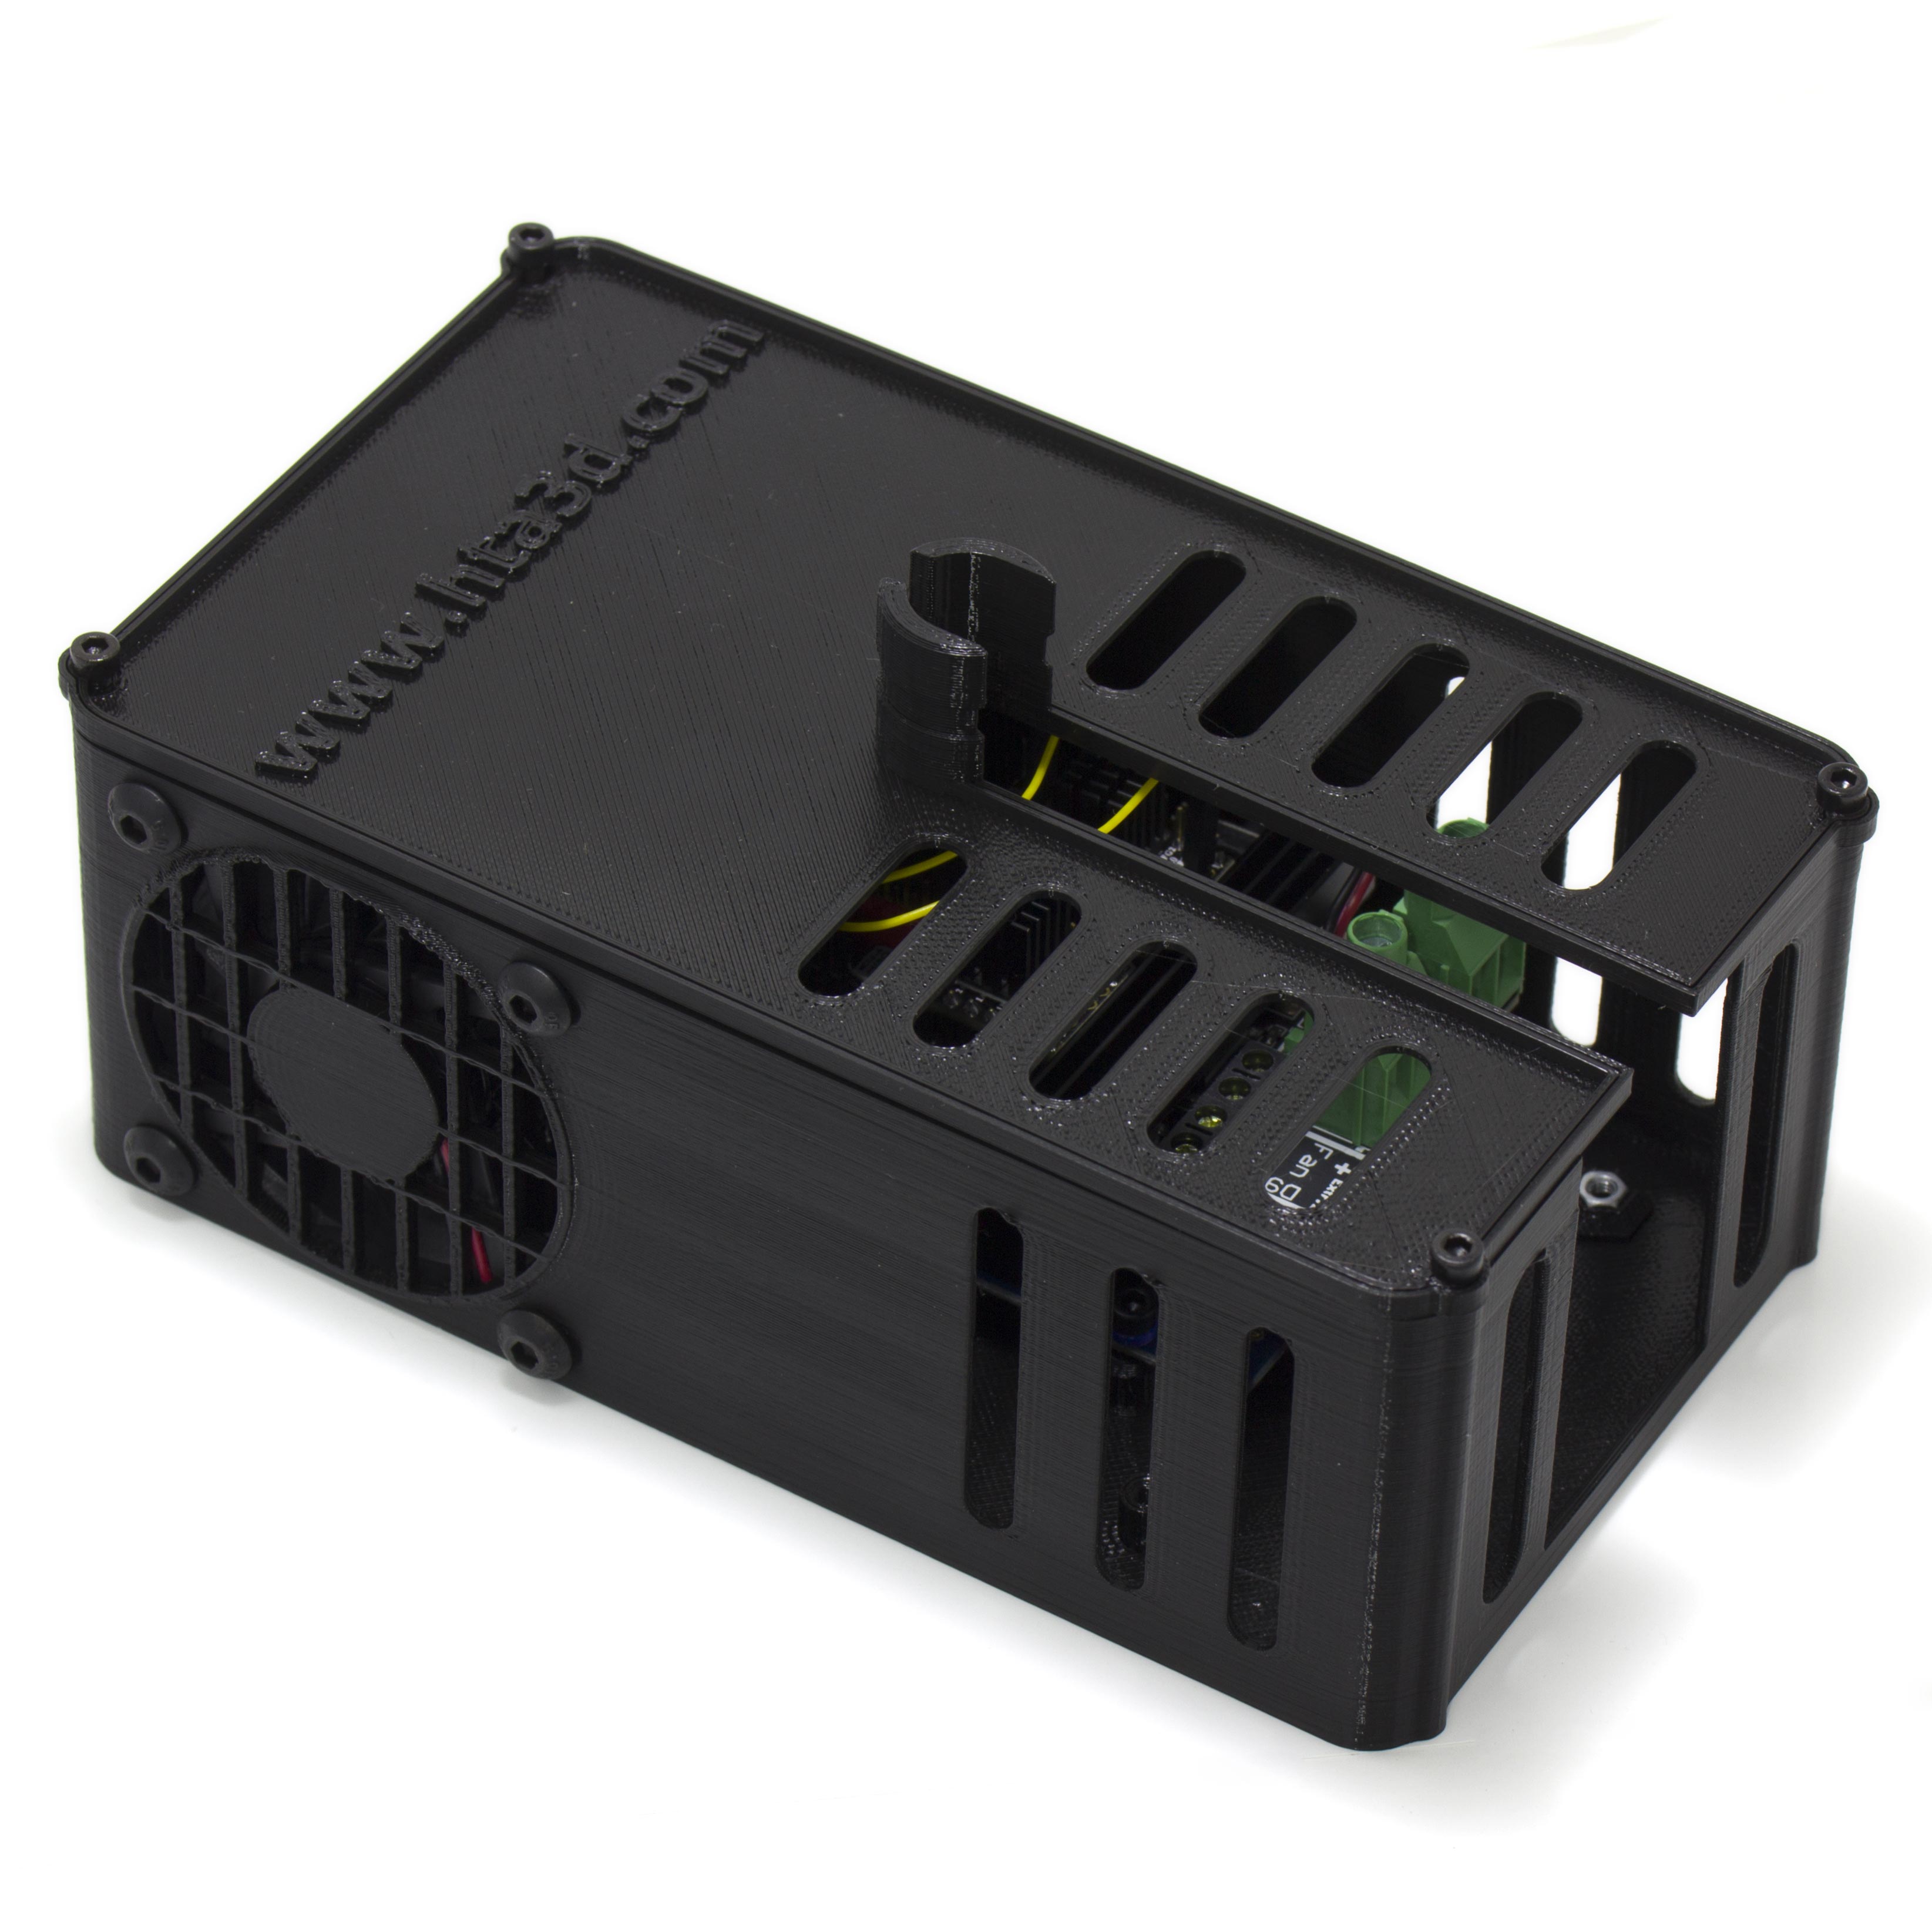 The Ramps 1.6+ is an ideal solution together with the TMC2130, in addition being a shield for Arduino Mega you can use the same Arduino board that you already have, optimizing the replacement of components.
This board has a high quality construction, connections for higher intensities and a mosfet capable of supporting very powerful heated beds. The TMC2130 is also a revolution in the movement of 3D printers.
When buying the pack, you can tell us to solder the pin for the sensorless homing in two of the controllers for an easier assembly. The board has a 12V output, in which we can connect the electronics fan or the hotend fan, the other will connect directly to the source through the bipolar expansion cable for fans.
The assembly instructions are in this link.
When activating "Sensorless homing" the mechanical limit switches of the X and Y axis will no longer be necessary, so they can be removed.
If you want the whole box, including the 6010 fan and the mega plate you can use this pack.
Power supply printed part
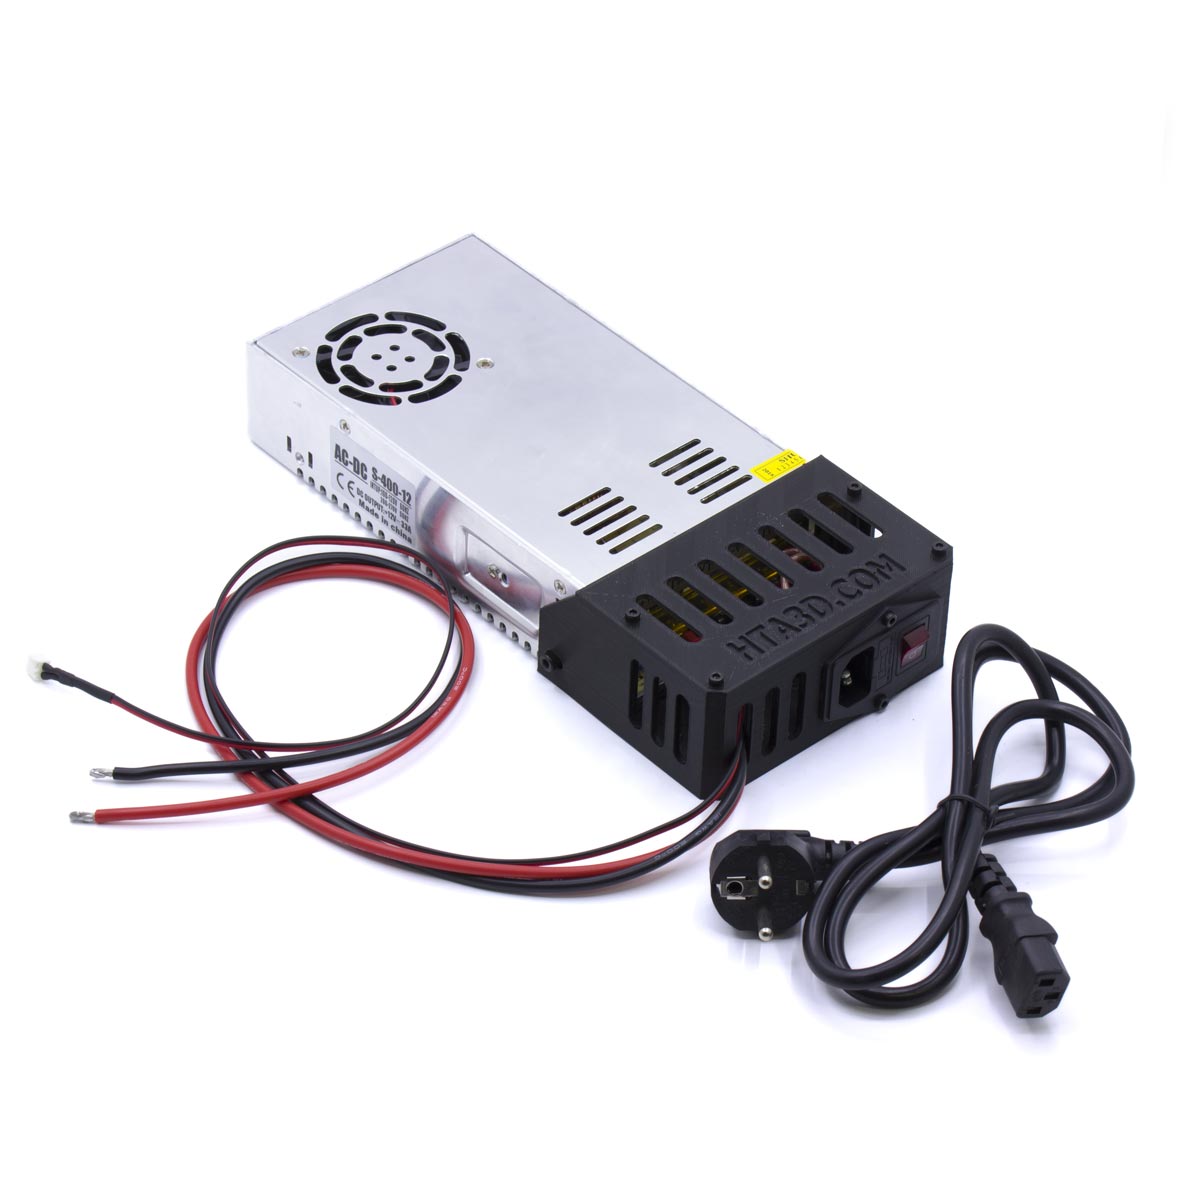 It allows the removal of the power cable, as well as easy connections to access the source. It's a simple update.
And here you have the pack including the power supply, you can leave us a comment when placing the order so that we send it assembled.
Adjust firmware according to the update we have made:
- If you have done all the updates: congratulations, updating the firmware will be easy, since you can directly install the firmware of our 3DSteel. For this, there is download latest stable version of our firmware from our website: https://www.hta3d.com/3dsteel and install it as indicated in this tutorial.
- If you have decided not to update any section, you will be able to make the necessary adjustments as well. In the following points we will discuss how to deactivate these functions. They will also be useful, if for example you want to install a component of our kit in another printer, such as the extruder or our electronics.
To deactivate a component it is sufficient to put two bars // before its definition. This will apply to all points to be deactivated, for example:
Active component:
#define FILAMENT_RUNOUT_SENSORInactive component:
//#define FILAMENT_RUNOUT_SENSOR
Extruder:
Deactivate filament sensor:
#define FILAMENT_RUNOUT_SENSOR
#if ENABLED(FILAMENT_RUNOUT_SENSOR)
  #define NUM_RUNOUT_SENSORS   1     // Number of sensors, up to one per extruder. Define a FIL_RUNOUT#_PIN for each.
  #define FIL_RUNOUT_INVERTING true // set to true to invert the logic of the sensor.
  #define FIL_RUNOUT_PULLUP          // Use internal pullup for filament runout pins.
  //#define FIL_RUNOUT_PULLDOWN      // Use internal pulldown for filament runout pins.
Deactivate 3DTouch sensor:
#define BLTOUCH
Deactivate automatic leveling:
#define AUTO_BED_LEVELING_BILINEAR
Deactivate safe homing (takes the extruder to the center of the bed when homing to prevent it from doing so outside of the printing base):
#define Z_SAFE_HOMING
By deactivating the manual leveling we can activate the function for semi-automatic leveling on the LCD:
#define MESH_BED_LEVELING
Dual pulleys use a number of steps per mm similar to the single extruder, but it is still recommended to calibrate the flow after installation.
Z axis and X axis with chains
If you decide to use any T8 version, it is not necessary to adjust the steps per mm. We do not recommend using the M5 version with automatic leveling, but if you decide to keep the M5 version you have to adjust these sections:
Adjust steps per mm, multiplying by 10, the steps per mm that are used with spindles:
#define DEFAULT_AXIS_STEPS_PER_UNIT { 80, 80, 4000, 130 }From 400 we went to 4000 with the TMC2130, and from 800 we moved to 8000 with the DRV8825.
In addition to this, it is convenient to reduce the maximum speed of the Z axis, although then it can be adjusted from the LCD:
#define DEFAULT_MAX_FEEDRATE { 300, 300, 2, 60 }With metric 5 we recommend a value around 2mm/s, but this value can change if for example we increase the intensity of the controllers.
220x220 Heated Bed
It does not require firmware changes, since this bed is configured to use the coordinates from -10 to 210 on each axis, if you use a normal bed of 200x200, you can use from 0 to 200 on each axis.
Electronics with TMC2130 configured with SPI and with Sensorless homing
To deactivate the sensorless homing function, go to Configuration_adv.h and deactivate this line:
#define SENSORLESS_HOMING // TMC2130 only
In addition, we have to change the direction of homing, to make it match the position of the limit switches:
// Direction of endstops when homing; 1=MAX, -1=MIN
// :[-1,1]
#define X_HOME_DIR -1
#define Y_HOME_DIR -1
#define Z_HOME_DIR -1
-1 means that it will go to homing in the negative direction. 1 means that it will go in the positive position. The endstops of the P3Steel are placed in the negative position, while in the 3DSteel the firmware is configured by default to homing in the positive direction.
You must also change the pin activation to match:
#define USE_XMIN_PLUG
#define USE_YMIN_PLUG
#define USE_ZMIN_PLUG
//#define USE_XMAX_PLUG
//#define USE_YMAX_PLUG
//#define USE_ZMAX_PLUG
With the endstops we have to keep the "MIN" active.
Finally, to deactivate sensorless homing, the position of the limit switches of X and Y must be indicated so that the impression is centered:
#define MANUAL_X_HOME_POS -20
#define MANUAL_Y_HOME_POS -18
Define the drivers to use the DRV8825, for this you have to indicate it in "DRIVER_TYPE", you have to change TMC2130 for DRV8825.
#define X_DRIVER_TYPE  TMC2130
#define Y_DRIVER_TYPE  TMC2130
#define Z_DRIVER_TYPE  DRV8825
#define E0_DRIVER_TYPE DRV8825
And adjust the steps per millimeter according to the resolution of each controller, remember that the TMC2130 have half the resolution of the DRV8825, but interpolate the intermediate steps, this provides a better movement with less load for the processor.
We go from:
#define DEFAULT_AXIS_STEPS_PER_UNIT { 80, 80, 400, 130 }To:
#define DEFAULT_AXIS_STEPS_PER_UNIT { 160, 160, 800, 260}Once this is done you will have the update active. Do not forget to tell us your experience and the results!
Related Products


7 Comment(s)
Entonces puedo actualizar el firmware de mi P3STEEL sin actualizar piezas a 1.1.9 o a 2.0 que teneis en descargas modificando esas lineas?
Si, puedes actualizar el firmware a la versión 1.1.9 o 2, sin hacer ninguna actualización de hardware si lo deseas.
Buenos días estoy pensando en realizar la evolución que acabáis de compartir, por cierto muchas gracias. la consulta es ¿se pueden reutilizar los drivers drv8825 directamente o se debe de modificar el marlin? de tener que modificar¿ cuantos pasos se deben de configurar? un saludo
Hola Carlos, Gracias a ti =) \r\nSi, puedes usar los drivers tal cual junto a la Ramps 1.4/1.5 de la versión anterior, en ese caso has de activar los finales de carrera en el firmware y ajustar los pasos por milímetro a la resolución de los DRV8825, lo indicado en el último punto, si tienes alguna duda más por favor no dudes en contactarnos usando el email o el formulario de contacto de nuestra web, \r\nSaludos!
Buenas Juan José, \r\n\r\nHe probado a actualizar de la 1.1.8 a la 2.0.1, con los respectivos cambios, ya que no he actualizado la P3Steel y conservo los DRV8825, pero me encuentro que la pantalla aparece mal, que apenas se puede leer o entender lo que se ve. Le he dado mil vueltas a los archivos, pero no se si la versión 2.0.1 deja de ser 100% compatible con la P3Steel. Desde que os compre la P3Steel, he ido actualizando a las distintas versiones que habéis ido sacando y no he tenido problemas hasta ahora, que con la versión 2.0.1 la pantalla es ilegible, a vosotros os funciona bien?
Hola Ismael, es un bug de arduino, debes usar la versión de Arduino AVR 1.6.23 o inferior, las versiones 1.8.X actualmente dan ese problema, contacta con nosotros para mayor detalle:\r\nhttps://www.hta3d.com/es/contacto
Buenas tardes Juan José,\r\n\r\nGracias, por tu respuesta, después de no dormir en toda la noche buscando la solución y preguntaros, creo que he encontrado la forma de solucionarlo bajo arduino 1.8.X, modificando en los DELAY del LCD, serian los siguientes valores y a mi parecer funciona correctamente por ahora, os adjunto la posible solución:\r\n\r\n#define REPRAP_DISCOUNT_FULL_GRAPHIC_SMART_CONTROLLER \r\n#define ST7920_DELAY_1 DELAY_NS(0) \r\n#define ST7920_DELAY_2 DELAY_NS(250) \r\n#define ST7920_DELAY_3 DELAY_NS(250)\r\n\r\nEspero que os sirva de ayuda ;)
Gracias Ismael por el apunte, tomamos nota para futuras consultas! seguro que si nos será muy útil.
Buenos días, he probado la solución aportada por Ismael y funciona perfectamente, actualizando la versión Marlin 2.0.7.2 la pantalla LCD de la P3Steel no se veía correctamente, fallando varias líneas y viéndose borroso Hay que entrar en Arduino, y en Configuration.h activar:#define REPRAP_DISCOUNT_FULL_GRAPHIC_SMART_CONTROLLERañadir justo después las líneas#define ST7920_DELAY_1 DELAY_NS(0) #define ST7920_DELAY_2 DELAY_NS(250) #define ST7920_DELAY_3 DELAY_NS(250)Compilado y subido ya se lee como debe ser. Gracias de nuevo a Ismael y a éste servicio de soporte, Saludos
e echo todos los cambios pero estoy con cotroladores a4988 y no me funcionan los finales de carrera
Con los A4988 has de usar finales de carrera mecánicos, no son compatibles con "sensorless homing"
gracias Ismael!!! r/n/r\r\ncon tus lineas de programa para modificar el DELAY del LCD he conseguido (por fin!) terminar la actualización a Marlin2.0.
hola instale 3dtouch en p3stell e intento compilar marlin 2 descargado de hta3d cambie segun vuestro manual y me da error
C:\Users\casa\AppData\Local\Temp\cclYjlIq.ltrans0.ltrans.o: In function `main':
C:\Users\casa\AppData\Local\Arduino15\packages\arduino\hardware\avr\1.6.23\cores\arduino/main.cpp:43: undefined reference to `setup'
C:\Users\casa\AppData\Local\Arduino15\packages\arduino\hardware\avr\1.6.23\cores\arduino/main.cpp:46: undefined reference to `loop'
collect2.exe: error: ld returned 1 exit status
exit status 1
Error de compilación
¿Estás usando VSCode?https://marlinfw.org/docs/basics/install_platformio_vscode.htmlTe lo recomiendo sobre Arduino IDE, especialmente en las últimas versiones de Marlin
Leave a Comment