Menu
Your Cart

Mellow FLY TMC2209 StepStick UART driver with heatsink

Mellow FLY TMC2209 StepStick UART driver with heatsink
New
Mellow FLY TMC2209 StepStick UART driver with heatsink
3.99€
Ex Tax: 3.30€
  • Stock: 30
  • Model: MELLOW-TMC2209
Fast shipping from Spain
Delivery from 24 hours and free shipping available in mainland Spain.
Stock on hand
Shipped quickly from Spain, with a full VAT invoice.
Secure & flexible payment
Pay by card, PayPal or bank transfer.
Expert technical support
Over 10 years helping customers with components and compatibility.

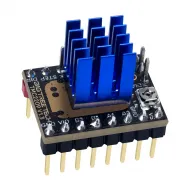
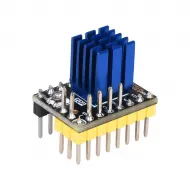
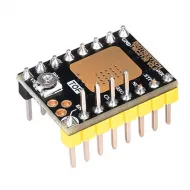
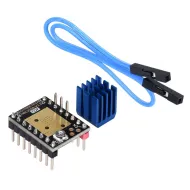
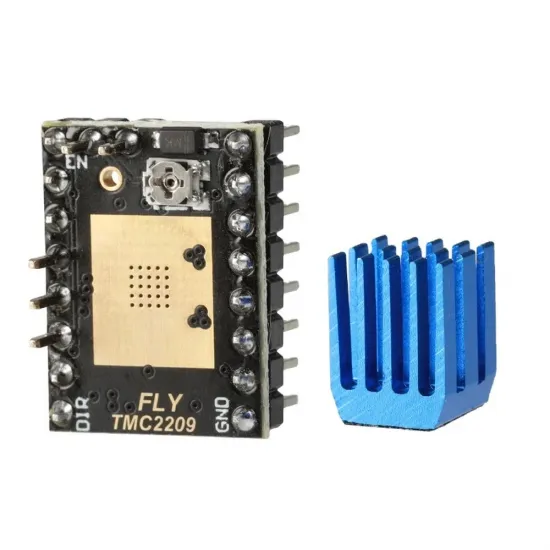
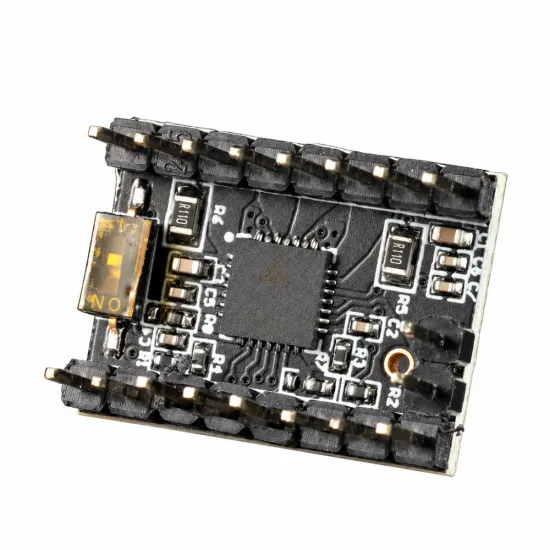
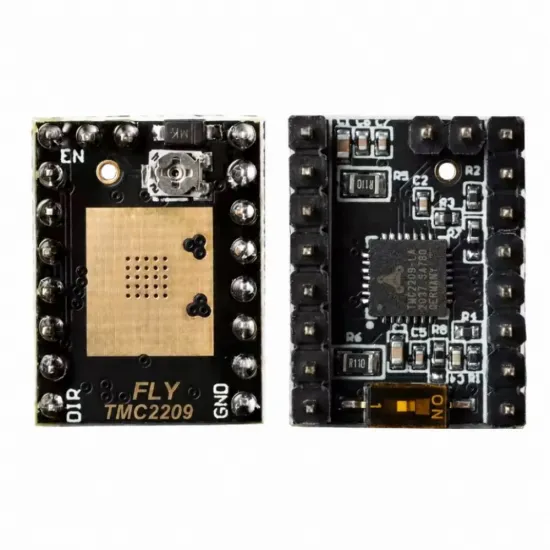
The Mellow FLY TMC2209 is a StepStick-format driver for bipolar stepper motors, with STEP/DIR motion control and UART configuration. It combines the TMC2209's features with an enlarged heatsink contact area and a small underside switch for DIAG. A blue heatsink is included.

An option for building or upgrading a 3D printer with removable drivers: choose between quiet StealthChop2 operation and dynamic SpreadCycle control, configure current through compatible firmware and use stall detection when the mainboard and configuration support it.

What distinguishes the FLY TMC2209?

  • Enlarged heatsink contact area: the metal contact surface and visible PCB vias help transfer heat to the heatsink. Suitable airflow around the electronics is still required.
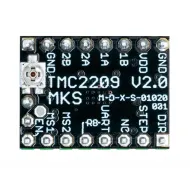
  • Underside DIAG switch: enables or isolates the signal used for sensorless homing, depending on the mainboard wiring. Check it when using physical endstops too.
  • UART adjustment: with the correct connection, configure current, operating modes and diagnostics without relying solely on the potentiometer.
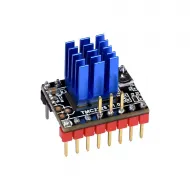
  • Included heatsink: you do not need to purchase this unit's heatsink separately; fitting it does not replace airflow or correct current settings.

Technical specifications

Brand and modelMellow FLY TMC2209, version with underside DIAG switch
Motor typeTwo-phase bipolar stepper motor, within the assembly's current limits
Application supply12 or 24 V DC, following Mellow's usage documentation
ControlSTEP/DIR for motion; UART for configuration and register readout
TechnologiesStealthChop2, SpreadCycle, MicroPlyer and StallGuard4
Advertised TMC2209 currentUp to 2 A RMS / approximately 2.8 A peak under suitable thermal conditions; not a guaranteed continuous setting for every installation
Sense resistors0.110 Ω; use this value in the driver configuration
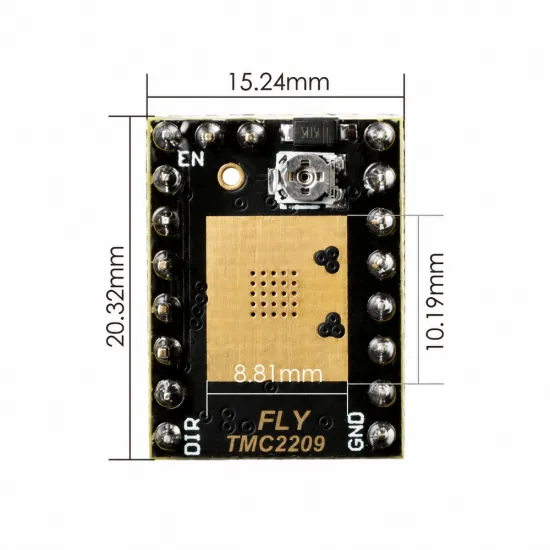
Nominal PCB dimensions20.32 × 15.24 mm; excludes the volume of pins and heatsink
Heatsink contact areaNominally 8.81 × 10.19 mm, according to the manufacturer's drawing
ContentsOne driver and one blue heatsink

Compatibility: check the socket and UART connection

The StepStick format alone does not guarantee that every pin matches. Before installation, check VM, GND, logic supply, motor outputs, STEP, DIR, UART and DIAG in both devices' diagrams. Identify orientation by the pins, not by module colour or potentiometer position.

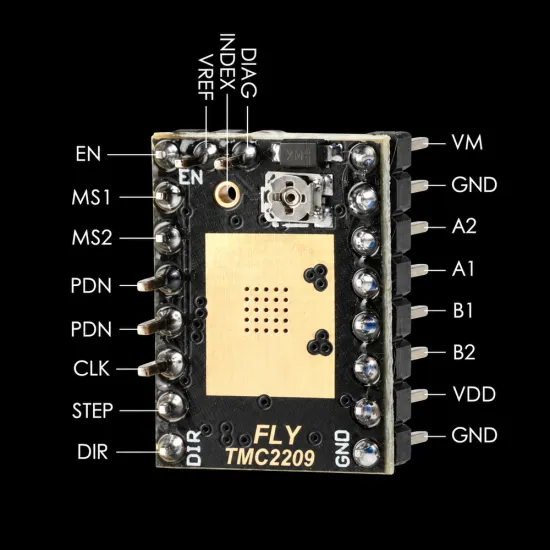
The documented pinout, viewed from the heatsink contact face with EN at the top and DIR at the bottom, is:

Position, top to bottomControl rowPower row
1ENVM
2MS1GND
3MS2A2
4PDN/UART: factory selectionA1
5PDN/UART: selectable alternative positionB1
6CLKB2
7STEPVDD
8DIRGND

VM is the motor supply and VDD is the logic supply: they are not interchangeable. A1/A2 and B1/B2 are the two motor phases. The drawing also identifies DIAG, INDEX and VREF; consult their positions in the specific diagram before making auxiliary connections.

For the classic FLY TMC2209, Mellow documents the factory UART position on the fourth pin of the control row, counting from EN towards DIR with the heatsink contact face as reference. Some mainboards or other drivers use the fifth position. The module has a hardware selection arrangement for adapting this connection: changing a firmware pin name cannot fix a physical mismatch. Do not indiscriminately bridge both positions.

On a mainboard such as the BIGTREETECH Octopus Pro V1.1 H723, check the socket's UART circuit and jumpers before installation; this is not presented as an unchecked drop-in replacement. If using an independent motor power rail, keep this driver on a 12 or 24 V supply: do not use 36 or 48 V.

It can be part of a Voron 2.4, Trident, Prusa i3-derived printer or an Ender 3 with modified electronics and removable drivers, but compatibility depends on the installed mainboard rather than the printer name. It cannot directly replace soldered drivers on a stock mainboard.

Current and cooling

Do not enter 2.8 A as an RMS firmware current. Adjust current to the motor, axis load and cooling. Check whether the motor specification gives RMS or peak current before transferring it to a driver setting.

Fit the heatsink to the intended area using a suitable thermal interface, without touching pins or components. Maintain airflow over the drivers and allow clearance for the heatsink. If temperature warnings, thermal shutdowns or lost steps occur, check cooling, current and mechanics; increasing current without checking the assembly can make the problem worse.

The chip's protection and diagnostic functions help identify faults, but do not replace correct installation or guarantee protection against every wiring mistake.

Klipper configuration

After verifying UART, jumpers and power, add or edit the relevant axis section. This example uses 0.80 A RMS and 16 microsteps as illustrative values, only for a motor and installation that support them. Replace the placeholder with your mainboard's actual UART pin; do not duplicate existing sections.

# In the existing [stepper_x] section:
microsteps: 16

[tmc2209 stepper_x]
uart_pin: <ACTUAL_UART_PIN>
run_current: 0.800
sense_resistor: 0.110
interpolate: False
stealthchop_threshold: 0

stealthchop_threshold: 0 keeps SpreadCycle enabled. To prioritise quiet operation, Klipper documents stealthchop_threshold: 999999 for continuous StealthChop operation, provided the axis works correctly in that mode. Identical torque or behaviour at every speed is not promised. interpolate: False follows Mellow's reference and disables internal interpolation; review that choice for your application.

If several drivers share a UART connection, also check uart_address and its hardware selection. Do not add an arbitrary address to a circuit that does not use it.

After restarting, check communication:

DUMP_TMC STEPPER=stepper_x

A UART read error requires checking driver power, pin selection, jumpers, PDN position and wiring. Motor motion through STEP/DIR does not prove UART works. A generic hold_current setting is not recommended: reducing current can cause small movements on some axes.

Marlin configuration

For UART control, select TMC2209 as the axis driver type in Configuration.h. In Configuration_adv.h, set RMS current in mA, sense resistance and microsteps. Example for X, with the same conditions as above:

// Configuration.h
#define X_DRIVER_TYPE TMC2209

// Configuration_adv.h
#define X_CURRENT 800
#define X_RSENSE 0.11
#define X_MICROSTEPS 16

The pins and UART connection must match the definition of your mainboard and revision. Do not copy another mainboard's configuration simply because it uses the same chip. Compile and flash Marlin after adapting the settings.

M122 checks communication, while M906 X800 sets X to 800 mA RMS on a configuration that supports that value. In Marlin 2.x, TMC_DEBUG extends the diagnostic report; it should not be treated as a universal requirement for the basic communication check. Saving EEPROM-supported changes with M500 requires EEPROM functionality to be enabled.

When using the module without UART, choose the appropriate TMC2209_STANDALONE configuration and set the hardware according to its documentation. This mode does not provide firmware control of current or access to UART registers.

Sensorless homing: an optional function

StallGuard4 can detect a motor stall and provide DIAG for homing without a physical switch, but requires working UART, correct DIAG wiring and axis-specific tuning. On this version, check the underside switch and the socket-to-endstop signal path. Do not connect a physical endstop to the same input when it is used by DIAG.

In Klipper, use endstop_pin: tmc2209_stepper_x:virtual_endstop, the actual DIAG pin and a tuned driver_SGTHRS between 0 and 255, with 255 the highest sensitivity. Set homing_retract_dist: 0 to avoid the second approach. Do not copy sensitivity or speed as a universal setting.

Detection depends on speed, current, motor temperature and mechanical resistance. Tune carefully, one axis at a time, with emergency stop available. This is not a bed probe or a guarantee of Z accuracy: homing by driving the nozzle into the build surface is not recommended.

Microsteps and interpolation are different

MicroPlyer can interpolate internally to 256 microsteps to smooth movement. It does not automatically turn 16 input pulses per full step into 256 firmware pulses or require multiplying steps/mm. If the input microsteps, motor and transmission remain unchanged, do not change steps/mm or rotation_distance solely because interpolation is enabled. If changing input microsteps in Marlin, review the steps/mm setting.

In Klipper, rotation_distance represents mechanical travel per revolution: if the transmission stays the same, changing microsteps alone does not require changing it.

It is for you if…

  • You are building or upgrading electronics with removable drivers and can check the pinout.
  • You want firmware current adjustment and driver diagnostics through UART.
  • You want a choice between quiet operation and dynamic control, with a heatsink included.

It is not for you if…

  • You need a drop-in replacement for a soldered mainboard driver.
  • You use a 36 or 48 V motor supply or require more current than is appropriate for this assembly.
  • You expect untuned sensorless homing or an automatic replacement for a bed levelling probe.

Installation and contents

Includes one Mellow FLY TMC2209 driver and one blue heatsink. Motor, mainboard and fan are not included. Disconnect main power and USB before inserting or removing the module; check that no residual supply remains. Never connect or disconnect the motor while the driver is powered.

Further information is available in the official Klipper TMC driver guide and the Marlin Trinamic documentation.

Write a review

Note: HTML is not translated!
Bad Good
Captcha